Setup & Development Workflow
After you have installed the Devkit locally, you will need to load it into a world.
The Devkit can be loaded into any world but for development purposes we'll load it into AKASHA's staging enviromnent available at https://next.akasha-world-framework.pages.dev/.
We recommend using an up-to-date version of Chrome browser for the best experience.
Let's get started to load the Devkit into the staging environment:
- On your browser, load the
mainFile(its url should be shown in your terminal), allow the browser to load the page by clicking onAdvancedand thenProceed to ... (unsafe). This step is required to bypass the browser's SSL warning
- On this same browser window, open a different tab and visit https://next.akasha-world-framework.pages.dev/ and authenticate (create a new profile or connect an existing account)
- After authenticating, navigate to the Extensions App -> Explore page from the sidebar
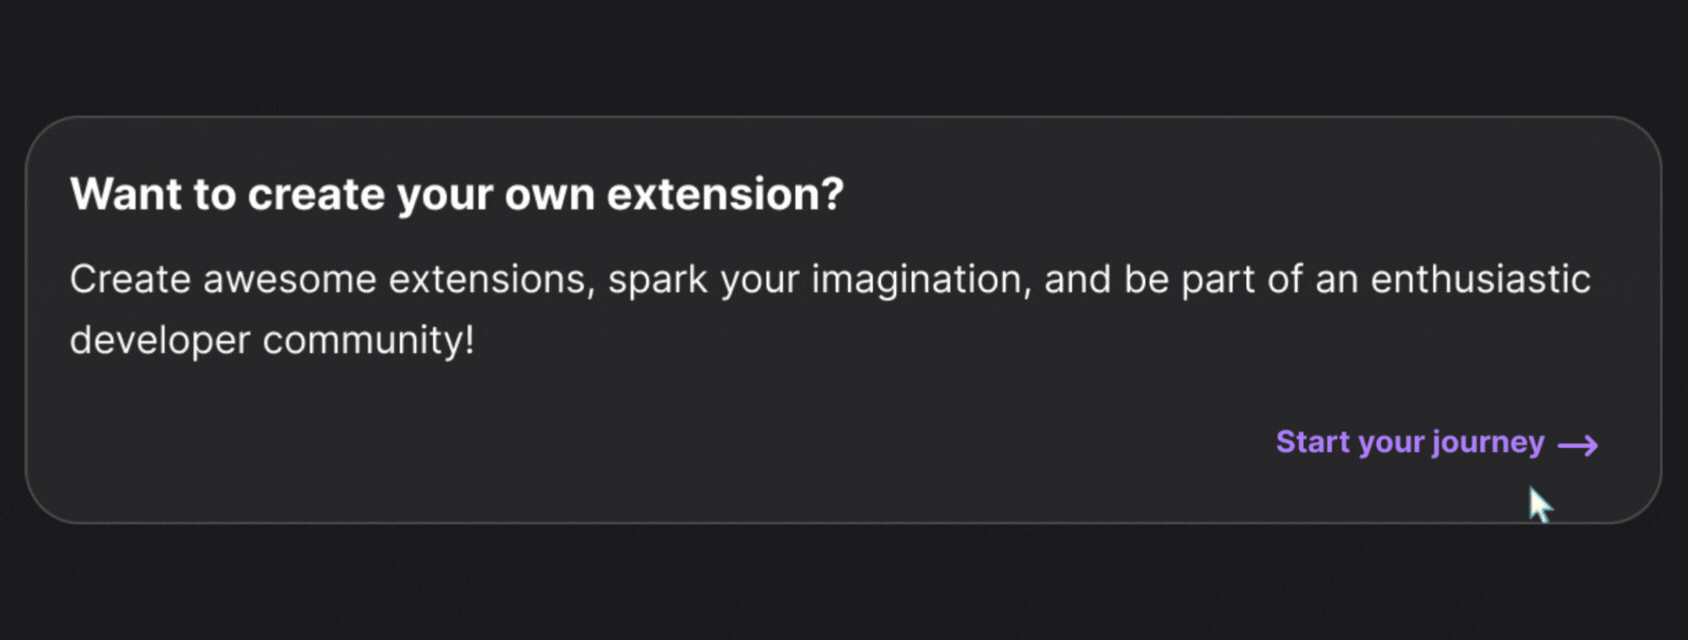
- Scroll down to the last card (image shown below) and click on
Start your journeyas a developer
- On the next page, enable
Extensions Developer Mode, and wait for the page to reload. This allows you to access the My Extensions page from the sidebar
- Navigate to the Extensions App -> My Extensions from the sidebar, click on
Createextension and fill out the form (example values show below)
- Extension Type: "App" // for now, we only support App extensions
- Extension ID: "extension-devkit" // you can find this id in the terminal where you ran the Devkit
- Extension Display Name: "My Extension" // choose how this extension will be displayed in its extension profile page
- Extension License: "MIT" // or choose what licence this extension should have
- Click on
Create locallybutton and on the next page, click onManage Releasesbutton
This is your Release Manager page from which you can create new releases for
this extension. But for now we are only interested in loading this extension's
source file for testing purposes
- Click on the
Test Releasebutton as shown in the following screenshot:

- On the next screen, fill out the
Source URLfield with the url of yourmainFile(refer to step 1). The other fields are optional
The next step is very important when loading the extension in the staging environment (https://next.akasha-world-framework.pages.dev). It can be skipped if you are running the world locally (generally on https://localhost:8131).
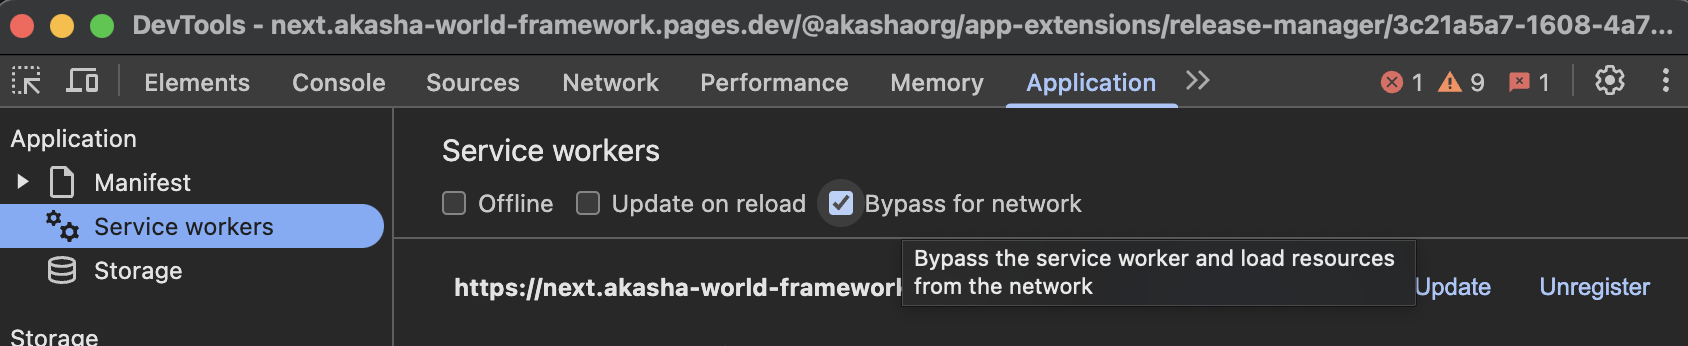
- Open the
Developer Tools(For Chrome: Right click on the page and click oninspect)
- Go to the
Applicationtab, then select theservice workerfrom the side-panel - Enable
Bypass for networkcheckbox like shown below - Keep the developer tools open as you proceed to the next step
- Back on the web page, click on the
Test Releasebutton. The extension should then load in the staging environment and display the welcome page
🙌 Congrats!
You can now start to develop extensions using your local installation of the Devkit. Start playing with it!
Notice that it has live-reload feature when you make changes to the source code.
Visit the tutorials section to learn more and build cool stuffs using the Devkit